You are using an out of date browser. It may not display this or other websites correctly.
You should upgrade or use an alternative browser.
You should upgrade or use an alternative browser.
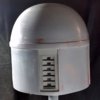
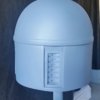
Another scratch build... cardboard/ bondo
- Thread starter beetle
- Start date
I'm new to this group but have been a Boba fan for years. I want to get my hands on a helmet but I've been unsure of the best way to do it. I thought long and hard about just buying a quality setup but now, after reading this page, I think I could do a build myself. All the info seems to be right here, if only the time in my schedule allows it. I might be posting a build here myself. Now....to pick a starting point.
zeroskillz
Jr Hunter
This is looking great. You're making it look easy. I may have to try my hand at a scratch build myself. 
Artakha
Active Hunter
Okay so... I'm just stalking around this place for now, trying to get and idea of what's what, and you all keep saying "bondo." So I looked it up. What kind of bondo do you use? There seem to be several different kinds. You know, bondo for this use, or that use, or whatever.
(sorry, this is probably not the best place to be asking XD)
This scratch build shows what to use. Tutorial: Scratch Build Helmet - Start to Finish by Ori Cabur He uses bondo glass (the greenish fiber stuff) which most people don't use, and then coats it with Bondo body filler, which is what this builder among others uses. Its really up to you how you go about your helmet. I would say just try something that works, and then improve on it.
I've been asked a few times about body filler and what I use. There are many manufactures but In my area 3M brand is available at hardware centers so that's what I use.
I have a scrap piece of glass I use to mix it. I put a small amount of filler and hardener in separate globs on the glass and mix up only as much as I can place in 5 minutes, if you mix up too much you will end up wasting too much material. Between mixing I use a straight edge razor to clean the glass.


Here's a little tip: if you need to build up a sharp edge on your bondo work, grab some self adhesive craft "foamies" at craft stores like Michael's or Hobby Lobby. You can cut to the shape you need stick it and fill it with bondo. Then peel it away when it's still gummy.


I have a scrap piece of glass I use to mix it. I put a small amount of filler and hardener in separate globs on the glass and mix up only as much as I can place in 5 minutes, if you mix up too much you will end up wasting too much material. Between mixing I use a straight edge razor to clean the glass.


Here's a little tip: if you need to build up a sharp edge on your bondo work, grab some self adhesive craft "foamies" at craft stores like Michael's or Hobby Lobby. You can cut to the shape you need stick it and fill it with bondo. Then peel it away when it's still gummy.


MilenkoFett
New Hunter
I agree! That foam trick will prove most handy. Thanks!
Wow, that's looking pretty amazing! Nice job!
Thanks le1120, I have been checking your stuff out too bro, looks good.
It's been a long time since I've had time to work on this thing.
I got a little more work finished on the ear parts, I am thinking I want to mold and cast these parts with resin while they are still rough, then finish and smooth it all out. I am having trouble finding the cardboard fibers when I go to sand these parts smooth.
I got a little more work finished on the ear parts, I am thinking I want to mold and cast these parts with resin while they are still rough, then finish and smooth it all out.
 I am having trouble finding the cardboard fibers when I go to sand these parts smooth.
Mister Hyde
Active Hunter
Your bondo work is top-notch. Looking at these pics there's not a hint this bucket was scratch built. This is truly amazing.A little more progress: I have started the ears using some scrap MDF and some vinyl to build up the thickness.
View attachment 91883View attachment 91884View attachment 91885View attachment 91886View attachment 91887
Also got the main bucket pretty close to finished, might redo the keyslots in the back.
View attachment 91892View attachment 91891View attachment 91890View attachment 91889View attachment 91893
Thanks Mister Hyde. That means alot, this is my second scratch build ever Stormtrooper Helmet 1st attempt at prop making and it's comments like that keep me going.
benkenobi600
New Hunter
Great looking scratch build. How did you get the dome so smooth and even? I'm having trouble with mine. Any tips to get it right or is it a case of just doing it by eye?
Stormcrow85
Hunter
Holy cow, this looks great. I have been looking at the helmets in my free time. I have been waiting until last to build my helmet because I am using the rest of the costume as practice for it. This helmet looks FANTASTIC from the pictures you have posted. Thank you for the foam tip, Did you just use cereal boxes to make most of the dome?
KryptonSon
New Hunter
That's amazing. I can't believe you did that with cardboard, foam and bondo. You have some amazing talent.
Thanks for the kind words guys. As far as tips for smoothing bondo, I applied it in very thin layers and tried to fill the valleys of the cardboard template and tried not to build up to high above the peaks of the form, I wanted to stay as true to Rafalfett's templates as possible. Then with a piece of sandpaper in my hand (no sanding block) I alternated sanding direction over and over and added more bondo on any low points or pits until it felt and looked right. It took several layers and a lot of time to get it to where I was happy with it.
The cardboard material I used for the entire helmet was the same, "mounting board" from Hobby Lobby (Crescent board), I used 3M super 77 to adhere the printed templates directly to the board before I cut and glued anything.
It's been a while since I have worked on it but I do plan on finishing this, I am a inexperienced at painting but with the help of you guys on this site I think I can do it with patience.
Similar threads
- Replies
- 4
- Views
- 1,658


