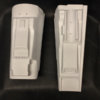
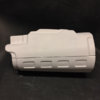
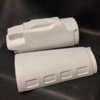
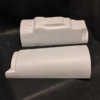
Seeking input before molding ROTJ gauntlets

Cruzer

Well-Known Hunter
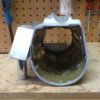
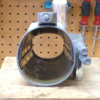
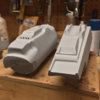
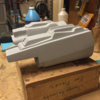
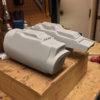
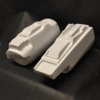
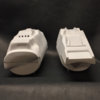
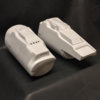
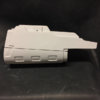
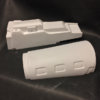
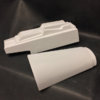
Hey guys. I wanted to see if the experts here could give input on what they feel needs to be changed before I mold these gauntlets for fiberglass casts. They were modified from a set of my Jango gauntlets, so I hope to dial in their accuracy as much as possible to your acceptable standards. I owe a couple sets to people but would be happy to make them available thereafter if there's a need.

I will be making a quick temporary mold to make solid casts for any modifications before making the master mold. This is so I can move the split lines between the tops and bottom shells if necessary. They also will be molded without the calc pad and dental expander because those belong to RKD, as well as without the various electronics and darts.

Any input would be appreciated.
Thanks,
Lorenzo

ImageUploadedByTapatalk1436557909.381246.jpg

ImageUploadedByTapatalk1436558026.335337.jpg ImageUploadedByTapatalk1436558039.134347.jpg ImageUploadedByTapatalk1436558052.070372.jpg ImageUploadedByTapatalk1436558067.022894.jpg

ImageUploadedByTapatalk1436557933.410053.jpg ImageUploadedByTapatalk1436557949.926205.jpg ImageUploadedByTapatalk1436557966.750230.jpg ImageUploadedByTapatalk1436558086.055045.jpg
 
I am not a gauntlet expert but when you decide to sell some I would be happy to get a set from you. I have loved trooping your Jango gauntlets.
 
I am home now so I can see the pics much better. I looked over the gallery pics and compared them to where you stand I am not seeing anything glaring. Some of your edges on the right gaunt may be a bit sharper than the edges in the Magic of the Myth gallery. I certainly like the sharpness but if you want perfect match you might soften the corners. But other than that I don't see much.

I hope that description makes sense.
 
Hi Cruzer,

These look very nice, and your paint job is killer! Maybe I just can't see it in your photos, but isn't there a lip around the nozzle end of the flame thrower? You can see bits of it in some of the promotional pictures and some of the screen images:

http://www.thedentedhelmet.com/gall...166-boba-fett-return-of-the-jedi-costume.html

http://www.thedentedhelmet.com/gall...n-of-the-jedi-costume-hd-screen-captures.html

http://www.thedentedhelmet.com/gall...n-of-the-jedi-costume-hd-screen-captures.html

Although, it's clearly broken away or missing in some other shots.

I have a question about your gauntlets pictured if you have a moment to answer -- it looks like there are hinges along both sides of each gauntlet. While I am slow AND old I can't figure how this works... do you fit them over your arms and insert one of the hinge pins from the elbow-end to secure them?

Thanks for any info!

Cheers,
dv8r
 
Yes that is how the hinges work. One side is a normal piano hinge set up. The other side you install the hinge but make the pin removable and put a bend on the end. (then personally I sand down the pin quite a bit so it comes in and out easier), When you close the gauntlets the hinges fit back together and you insert the pin to secure it. I use this system on my Jango gauntlets and it works incredibly well.


And back to the topic: I know that the lip around the flamethrower does appear in the several shots but it is missing (not broken, just not there) in pics from Magic of the Myth. The lip is also missing in the new Costumes book they put out last year. They picture several gauntlets in the book but none have that part.

There is no doubt that it is there in the screen shots. I think it is accurate to make them either way. I am not sure what happened to the set that had the lip/flange on the end but they don't seem to show up in the archives.
 
Last edited by a moderator:
Thanks buddy for answering that. Just like Mullreel said, there are two lengths of piano hinge whose opposing sides are glued to the insides of each halve that hold the gauntlets closed when the original length of pin (plus 2-3 link lengths more for the handle) is reinserted. I prefer to use the 1-1/8" wide hinge from Home Depot because it's largest in diameter and seems to pull out the easiest. As I'm pulling it out, I also clear-out the insides of the links by carefully drilling them out with a long drill bit. I can't remember off the top of my head but I think it's a 3/32" drill bit that works best. My local Ace Hardware usually carries them. The pics below show them with the pins. So far it's been the best method I've found to join two fiberglass shells for the constant on/off process associated with trooping.

I'll add a pic of the hinges removed and laid out once a return home after this weekend.

ImageUploadedByTapatalk1436709141.021693.jpg ImageUploadedByTapatalk1436709174.657779.jpg ImageUploadedByTapatalk1436800837.971343.jpg
 
Last edited by a moderator:
Hey guys. Finally revisiting this project by making a few modifications for the sake of hopeful greater accuracy and improving the overall symmetry to my original shells. Unfortunately I had to glue the shells together, fill them with rigid foam, and primer over the awesome paint in order to give me a solid object that I could work with. I'm still trying to decide the ideal locations where the shells should split into two. Please let me know if anyone sees any discrepancies, as I hope to have them in silicone as soon as possible. Thanks -Cruzer

ImageUploadedByTapatalk1444281075.796076.jpg ImageUploadedByTapatalk1444281092.135162.jpg ImageUploadedByTapatalk1444281105.024354.jpg


Sent from my iPhone
 
Last edited by a moderator:
Thanks buddy for the vote of confidence. I made a few adjustments here and there after spotting a few inaccuracies when comparing them to photos mainly in the SE gallery. Because these will be cast in fiberglass, I tried to locate the split lines where they actually were on the right shells, and where they appeared to be simulated on the left shells had they not been overlapped for Velcro. I still need to look at the dart placements and adjust if necessary. I'll also give them a light coat of Rustoleum metallic silver to seal everything once I have a chance to pick up some tomorrow or Friday. The right gauntlet is approximately 8.5" long, while the left is 9.75". My goal is to try and get them molded this weekend.

ImageUploadedByTapatalk1444274344.018665.jpg ImageUploadedByTapatalk1444274357.725052.jpg ImageUploadedByTapatalk1444274375.400956.jpg ImageUploadedByTapatalk1444274384.985616.jpg ImageUploadedByTapatalk1444274427.760723.jpg ImageUploadedByTapatalk1444274436.415969.jpg ImageUploadedByTapatalk1444274445.018398.jpg ImageUploadedByTapatalk1444274454.024089.jpg ImageUploadedByTapatalk1444274463.960342.jpg ImageUploadedByTapatalk1444274472.351292.jpg


Sent from my iPhone
 
Last edited by a moderator:
The split looks pretty good to me.

I will still be up for a set of these when you start casting them.........
I have a set promised to the member who bought my last Boba, which was one of the main reasons for this project. However, you can have the next set if you'd like. Here's an interesting comparison pic. Looks like I need to slightly change an angle in top right-hand corner, which should be a quick fix...

Untitled.png
 
Last edited by a moderator:
Hey Cruzer. Looking really good. A couple of things I noticed and sorry I haven't chimed in till now. I have been busy and couldn't do the comparisons.

Along the the front of the left gauntlet where the calc greeblie sits there should be a raised lip right along the front of that flat area. It makes a recess for the greeblie to sit down in. I don't know if you can do this but can the angled portion just behind the calc pad be angled back a little more?

On the inside of the left gauntlet where there is the raised square box you might want to make the corners on it less sharp. It also doesn't have a hole in it. Also I don't think you need a recess for the red light. It just sits flush on the surface.

On on the left side as you look at the top of the left gauntlet about at the mid point there is a radius that looks a little off in that pic. It looks like it has just a little too much curve to it.

I am not beating up your work it is just what I noticed. They look really nice as is, but just thought I would mention those things. I would have marked up a picture to explain but I am writing this at 30000 feet in the air and am lucky to have just a little wifi. :)

I will ill take a look at the right gauntlet and see if I see anything on it that could be tweaked.
 
The only thing I can see on the right side is that your lines and curves are crisper than the actual gauntlets. Maybe a little rounding over of the corners and blurring some of the details will get it to match if that is what you are after.

Also the right gauntlet has a slight round over on the front edge as you go out towards the wrist. I couldn't tell in your pics if that was already there or not.
 
Sounds good, just shoot me a pm when you're ready. I'm thinking of keeping them in the same price range as my Jango gauntlet kits, however, they'll have my usual 3 month wait time because unfortunately life keeps me busy. I am happy with how these are coming along...
55533cd33405b532f29a5eec3df0bc5a.jpg
f892611e0cfd9c11c6946b88c73cb5cc.jpg
b4ffb9a94429cc5e05f2f4c62989aab8.jpg


Sent from my iPhone
 
This thread is more than 8 years old.

Your message may be considered spam for the following reasons:

  1. This thread hasn't been active in some time. A new post in this thread might not contribute constructively to this discussion after so long.
If you wish to reply despite these issues, check the box below before replying.
Be aware that malicious compliance may result in more severe penalties.
Back
Top